Main Page

Friday, November 14, 2014

Full Float Rotor for the Frankenbike

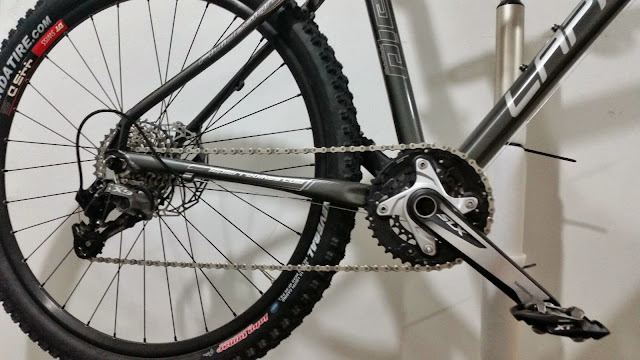
Decided to go Full Float Rotor (Front 180 and rear 160) for the Frankenbike. can say that after last weeks Kamensah ride that the full float rotors does make a lot of difference when you do very demanding down hill ascends as it does help with the cooling of the rotors and this results in less fading of the brakes, Plus it looks so cool on the frankenbike.

Picture of the 160mm standard fixed 1 piece rotor previously installed on the bike. Yes the Avid HSX is about 3X more expensive then the conventional 1 piece rotor but it performs so much better. 

Wednesday, November 12, 2014

Monday, November 10, 2014

Going the 27.5 Frankenbike Way.

Finally decided to go for the 27.5 Frankenbike way. Experimenting on the 27.5 front and a 26 rear rim/tire configuration. first outing proved to be an eye opener to how the 27.5 differ to the 26 when handling obstacles. the 27.5 roll over the obstacle better than a 26 which pretty much looses its composure after going over obstacles of a certain limited size. this equates to a better handling bike when performing a technical climb.

I choose the 27.5 ZTR Crest rims which was super light and I paired the Black ZTR rims with the LEFTY 32H hubs from Circus Monkey (Metallic red) all this was laced up with black DT Swiss Stainless Steel Butted Spokes. Nothing like a custom build wheel to quench a bike builder's thirst.  The Frankenbike is stopped by a 180mm Avid HSX full floating, heat dissipating black Rotor.

Friday, October 24, 2014

Titanium Bolts for your MTB anyone

Titanium Bolts for your MTB anyone...For those weight weenies out there, it makes quite a difference. 2 units of the Titanium M6x18 Bolt weights 1 ounce, whereas 2 units of M6x18 mild steel bolt weights 2 ounce. The Titanium bolt weight roughly half the weight of its steel counterpart of the same size.

Thursday, October 2, 2014

Fresh Bearings for the CODA Lefty Hub


The CODA Lefty hub felt rough so I had decided to replace them with a fresh set of Seiko 6805 and 6902-2RS Japanese sealed bearing replacement. The job was a 45 min affair with basic to moderate difficulty. I had performed the task with a set of screwdrivers, a set of Torx wrench, a piece of thick foam to lay down the wheel and a rubber mallet. Initially I had removed the existing bearing by knocking them out from the inner side towards the outer direction. Cleaned the crevice where the bearing is seated and applied some lithium grease into the surface. Installation of the bearing at the disc side was a 2 minute job but the bearing at the far side required more time and effort as it is recessed.


Wednesday, September 17, 2014

Lefty build cont....

Got around to install the sram 10speed chain and configured the X9 rear derailleur with the Jagwire cable and housing.

Tuesday, September 16, 2014

Lefty Mountain Bike Build

Decided to embark on a new project to build a mountain bike from scratch from parts sourced on-line. This will not be an ordinary MTB but a unique hardtail mountain bike which utilizes the cannondale Lefty fork for its front suspension. Firstly a steerer for the lefty needs to be acquired, the natural choice would be the to select the steerer from Project321.com the Operations Coordinator there named Stephanie was most helpful during my purchase procedure at their on-line website. Next i managed to score a Carbon Lefty ELO (Electronic Lock Out) from ebay at a very attractive price. Next i managed to purchase a well preserved Lapierre R700 26er frame from our malaysia bicycle trading website called bicyclebuysell.com 


Sunday, August 17, 2014

Oakley Radarlock Edge Matt Glacier - New addition to the family

Oakley Radarlock Matt Glacier -
Latest addition to the family, a Radarlock Matt Glacier. This eyepiece comes with dual Edge type lens, a G30, a Grey Iridium lens, an extra nose piece and complete with a trendy White Oakley Vault.


I have also discovered that the Oakley SI M-Frame V2 neck strap fits nicely on the Radarlock. This neck strap is useful if you need to secure the sunglasses for very harsh environment like water sports. I have lost a Razor Blade many years ago to the sea during a vigorous canoeing event when my canoe capsized.


Wednesday, July 23, 2014

Oakley Collection

The following is my collection of Oakley eye wear throughout the years.


Back To Black

Decided to remove all the decals and go back to basic black. The DIY decals are getting dated and falling off.

Tuesday, July 1, 2014

Giro Trans Road Cycling Shoe

Giro Trans in da house...an incredible road cycling shoe with customizable arch inserts. The rigidity of the Trans is enhanced by the EC70 carbon Sole. Feel of the shoe is incredible with its customizable inserts that will feel like its snug but not restrictive. I have tried the Trans with and without socks (Being a triathlete and all). Ankle near the shin was chaffed when I went sock less due to the nature of the Tongue of the Trans which tends to protrude somewhat more then is needed. Nevertheless the GIRO Trans is a great shoe.


Titanium For Life...

New addition to the family. A classic Titanium Frame in a form of Litespeed Firenze with Zipp 404 Wheels, Zipp Service Course Handlebars, Zipp Service Course Handle Stem, Fizik Pave Saddle and SRAM RED Groupset.

Monday, June 23, 2014

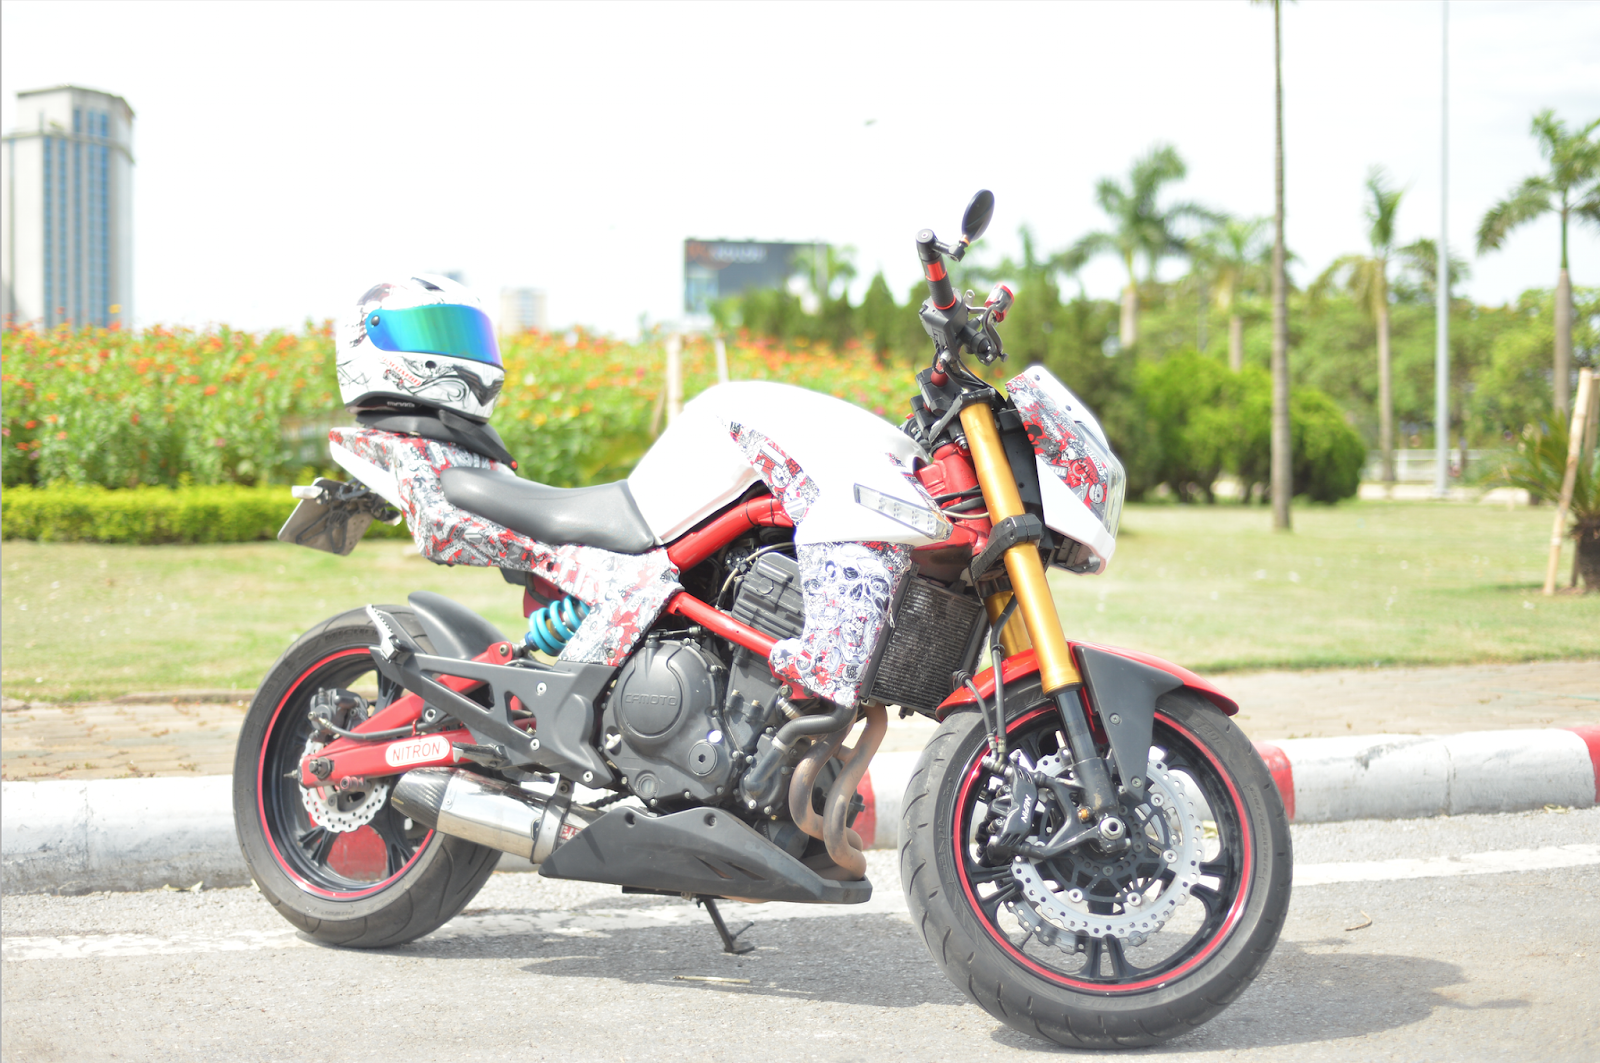
Tommi's CFmoto 650nk

Gorgeous mod done by Tommi from Vietnam using the ZX10 Fork and Versys lower triple....
 Love the graphics on the bike...

Tuesday, June 3, 2014

Hollowtech To GXP Bottom Bracket Replacement


Just did a Hollowtech To GXP Bottom Bracket Replacement for the Cervelo P2 using the Sunlite Tool BB Hollowtech2 / GXP Wrench. FYI, the GXP & Hollowtech shares the same wrench configuration but the BBs are not interchangeable due to the size of the opening (Inner Diameter) of the GXP (SRAM) which is smaller than the Hollowtech (Shimano) BBs. At least that is true when I tried to insert the Shimano 105 Crankset after removing the SRAM Red Exogram crank which won't go though the left side BB. However I am still unsure the usage of the Plastic cap that comes with the wrench.


Monday, May 5, 2014

Carbon Fork Steerer Cutting DIY

Carbon Fork steerer cutting DIY


Not quite happy with the initial setup of the cockpit of the Litespeed Firenze. Felt that it was too tall at the front although it was very comfortable but had to look for an optimum position which was aero but comfy as well. Did not have the proper tool for the job so I set up to perform the task with whatever I had at the moment. The tools that I had used:
- Old handle stem with the same diameter (1 1/8)
- Old Fork spacer
- Metal Hack Saw.
- Dremmel Tool

Initially I measured the desired height of the handle while fastened to the fork. Marked the height as well as the measurement. Learnt that the grease from the head part will cause the marking you make to dissappear upon removal later. So remember to measure twice and cut once (Nearly cut the wrong length initially..phew!!). Clamp the old handle stem to the fork and slide the space into place. Then tape the space to the spacer to the handle stem about 1mm below the spot that you will cut so that it does not move around. Proceed to cut the fork at the desired spot ad dremmel off the irregular areas to make sure that the surface is as flat as possible corresponding to the spacer. 

Thursday, April 24, 2014

Item for sale for Kawasaki ER6N/ F & Versys

Item for sale for Kawasaki ER6N/ F & Versys
                                                             Connection Rod
                                                                  Radiator Fan
                                                                    CrankCase
                                                                       CrankCase
                                                                      Brake  Caliper
                                                                    Rear Shocks
                                                                       Radiator Fan
                                                                  Cylinder Head
                                                                          Cylinder Head
                                                                Rear Shocks
googleb7197f8cf44aaff3.html